Sunday, 27 September 2020

getting OBDII to work on late 90s JDM toyota ECUs

 Some JDM toyota ecus are ISO14230-4(5 baud init) compliant

This protocol is poorly supported by most OBD2 android applications yet but some do support it well.

To make it worst not all BT obd2 dongles out there support this protocol either.


I was able to prove this configuration personally on 2 non obd1 JDM ECUs already

ST215 3S-GTE A/T (89661-21330)

ZZT231 2ZZ-GE M/T(89666-20060)


you might need to make an obd2 port in cases of an engine swap

In the celica case (zzt231) the north american equipped obd2 port was OK as found.the north american 2ZZ-GE used a different obd2 protocol but relied on the exact same wiring diagram so no work was needed.

first of all the obd2 port pinout must be like this.

SIL comes from the engine ECU matching pin. this will be case specific.

pin 4 and 5 are grounds (which may need to reach ECU grounds in case you get issues) 

B+ is 12v power for the tool connected on the obd2 port, I suggest not powering this at all time to avoid battery drain

an ELM327 BT dongle was used, it was a BAFX PRODUCTS OBDII Diagnostic interface. other elm327 dongles will work with varying level of success. if you already own some different models I suggest you try them out before buying the BAFX .

Car Gauge Lite

This app is definitely not my favorite but proved to work through out the tests!

first of all you need to pair your OBDII device in the android bluetooth settings dialog before starting the new app.

Here is the car gauge lite main screen.  

beware, this lite version is ridden with ads to a point that makes it extremely annoying and hard to conduct any serious work. A paid ad free version is available. I suggest you get the Lite version working before going for it.


In the application preferences you will need to check a very specific option for this to work at all.


after this,with the elm327 pluged into the car and key ON or engine running you will be able to bluetooth connect to it.


there will be 4 dialogs asking for selections to be made, keep in mind that my OBD2 bluetooth MAC address wont be the same as yours. you will have to look it up in the android bluetooth settings dialog and remember it.


At this point you are connected to the ECU !

like all modern OBDII android app you will have to spend endless time building your very personalized dashboard including the fields you care for.


Sunday, 5 January 2020

mon AE86 jusqu'a present

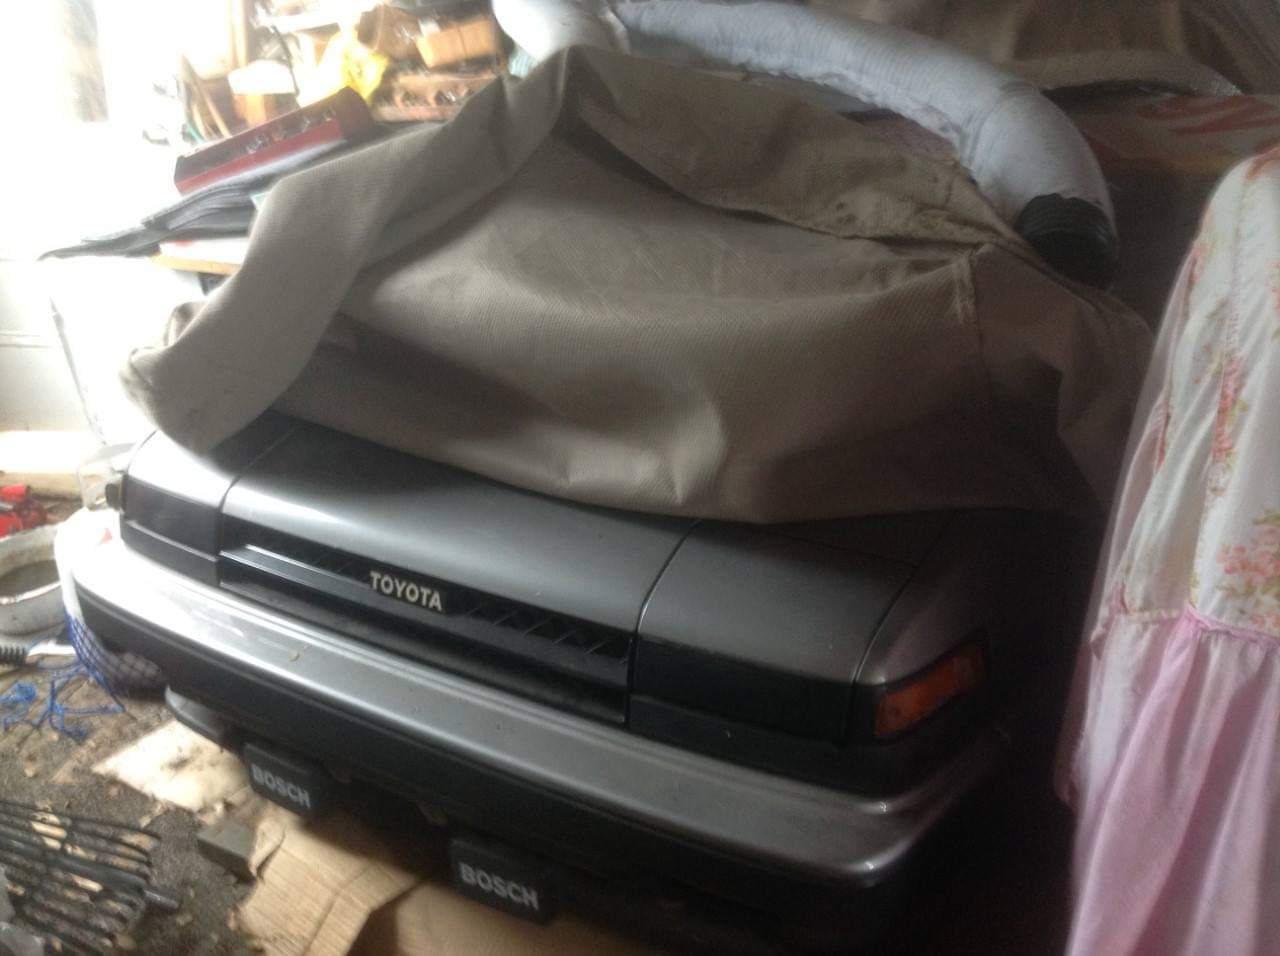
 TOYOTA COROLLA GT-S 1985


Voici en résume mon aventure jusqu’à présent...

17 ans d'entreposage

La voiture a été acheter au printemps 2019 de son 2e propriétaire après un entreposage de 17-19 ans.
les freins et l'alternateur étaient saisis, la voiture huilée préventivement a l’extrême, pas de batterie, jamais vu le moteur fonctionner. tout semblais prometteur.


Retour a la vie active

En début Juin la voiture toujours non fonctionnelle a été sortie de son repos et remorqué depuis la malbaie jusqu’à la rive-sud de Québec sur une distance d environ 190km.


pneus parfaitement peu usés ,conservés dans des sacs durant tout l'entreposage

une fois arrivé a destination le tune-up a immédiatement commencer aillant comme objectif au jour 1 de voir le moteur fonctionner.


Apres avoir mis une batterie neuve, flusher le vieux carburant pour du nouveau, changer le filtreur a essence. le premier demmarage a eu lieu assez naturellement au premier essai. 


L'engine bay etait parfaitement huiler pour contrer la rouille


Le vieux gas a ete utile pour enlever le huilage

L'alternateur, pompe a eau, timing belt absents
le tube de recirculation du liquide de refroidissement a défoncer lors du travail sur l'alternateur,reconstruit a main levée


pompe a eau changée

étriers remanufacturés et lignes flexibles de performance neuves aux 4 coins

Seule une ligne hydraulique a du être refaite, celle sur l'essieu arrière,toute lesautres étaient protégées dans l'antirouille

les amortisseurs arrières ont été changés du a la facilitée de la tache et le cout de reviens très bas
La voiture a rester en travaux du 7 au 21 juin ou elle était suffisamment fonctionnelle pour commencer la saison.


Enfin fonctionnelle!

voyage inaugural

la voiture a tenu le coup après les premiers 150km :)


Reparations au fil du temps

un total de 7500km pendant un peu plus de 2 mois ont été parcourus en 2019 avec la voiture, quelques repartions ont étés nécessaires, étancher des fuites de liquide de refroidissement, réparer des bouts du système d'échappement.
éclairage au LED a jour

tube de pompe a eau qui coulais

nouveau silencieux relativement d'origine


Sunday, 17 March 2019

TOYOCOM :: UNIVERSAL MODE how to monitor fuel trim

Getting fuel trim into toyobd1

All pre-obd2 diagnosis box have the VF(1) contact pin.
Depending on the ECU and production years some can output the obd1 data stream ,some will only give the fuel trim.

following the theory found here https://people.well.com/user/mosk/Vfsignal.htm a toyocom sensor curve was written for it.

The fuel trim tells us how much the ECU believes the engine is out of tune, a near 0% is a perfect score.

Android app setup

With toyobd1 running and the bluetooth connection established with your toyocom.
Go to main menu /configuration / Display
in there check the VF1 checkbox
Go back to the main display, there you will find the new VF1 cell
in that cell you will find a button in it`s upper right corner. Press on it.
a dialog will appear for you to choose a sensor curve to use for VF1.
In there using the drop down menu select 'Toyota obd1 fuel trim'
then press the apply sensor curve button
the dialog will go away and the new senor curve will be applied on the VF1 display cell.


Sunday, 10 March 2019

TOYOCOM :: OBD1 MODE

WHAT IS IT DESIGNED FOR

Meant to read the Toyota obd1 data stream found on a known list of vehicles
for an up to date list please have a look here

 ENGINE ERROR CODES

Engine error codes output can be triggered with the tool, depending on the car`s wiring diagram it may lack the W wire in the diagnosis box to get the codes into the toyocom, in this sitatuation one must rely on eye reading and compare with the chart built into the error codes glossary built into the android app. On cars with complete wiring the error codes are fed into the tool and the android app.

CUSTOM INPUTS

Additionally it allows to read simultaneously custom inputs from different spaces in the diagnosis box, (VF2,TS,TT,AB) This allows to replace the SPD,RPM,INJ reading with custom sourced signals which are read more often (faster on screen). It also allows to just route additional sensors into the tool.

TOYOCOM :: UNIVERSAL MODE

WHAT IS IT DESIGNED FOR

Meant for Toyota cars before the obd1 data stream. Quite limited in comparison with the OBD1 mode and more involving but still relevant on cars with nothing at all. On older cars VF (fuel trim) can be read directly off the diagnosis box, this tells us how much the engine is out of tune, with the added installation of  the 'one wire setup' one can see the injector usage in conjunction with the fuel trim at any given RPM making for a deeper understanding of the situation, useful for engine tuning on stock ECUs or health monitoring for a daily driver.

 ENGINE ERROR CODES

Engine error codes output can be triggered with the tool, depending on the car`s wiring diagram it may lack the W wire in the diagnosis box to get the codes into the toyocom, in this sitatuation one must rely on eye reading and compare with the chart built into the error codes glossary built into the android app. On cars with complete wiring the error codes are fed into the tool and the android app.

CUSTOM INPUTS

Additionally it allows to read simultaneously custom inputs from different spaces in the diagnosis box, (VF2,TS,TT,AB) This allows to replace the SPD,RPM,INJ reading with custom sourced signals which are read more often (faster on screen). It also allows to just route additional sensors into the tool.

TOYOCOM :: the one wire interface


 Allows to compute fuel consumption ,trip information and basic injector usage out of one added wire on nearly all early EFI toyotas, without the obd1 data stream.


benefits

  • extremely easy one wire job, fast and simple.
  • allows to get many information out of it
  • -injector opening
  • -engine rpm
  • -injector duty cycle
  • -fuel consumption
  • -fill the built in trip computer
  • faster refresh rate than regular obd1 mode

pitfalls

  • loses RPM when injection stops, happens when deceleration fuel cut off occurs

*All pictures in this post have been highlighted in blue to improve understanding


TEST MULE

1997 1mz-fe V6 in an MR2  , without relying on obd2 or obd1, using only the Toyocom universal mode


PHYSICAL WORK ON THE CAR

  • you need to have a toyocom as found on www.zf-scantools.com
  • you need a diagnosis box with at least +B and E1 (grey and black diag boxes have it, obd2 cars might lack some pins)

1MZ-FE DIAGNOSIS box with added VF2 contact pin
install a new wire from VF2 in the diagnosis box to one injector wire of cylinder 1 (#1 or #10 on the wiring diagram of your engine. for this particular installation the last cylinder of the front bank was chosen due to the ease of reach.

A T-junction was made at the #6 wire where it was easy to reach

the same zone seen from a far before the new wire was tucked in


follow this link to understand how to open up the diagnosis box and add a new metal contact in there for your new wire

ANDROID APP SETUP

following this video you should be able to mimick the setup for your own car. resumed below are the steps.


  • go to main menu
  • go to display settings
  • show GPS
  • show VF2
  • show VF2-2
  • remove obd1 specific fields
  • go back to main menu
  • go back to main display
  • click on VF2 cell
  • apply injector opening sensor curve on VF2 (leave MS as the measurement unit)
  • apply injector opening sensor curve on VF2-2 (swipe up on the cell to reach either RPM4,RPM6,RPM8)
  • go to main menu
  • go to device features
  • set the tool to UNIVERSAL MODE
  • set VF2 as frequency input
  • set rpm channel to VF2-2
  • set injector channel to VF2
  • set speed channel to GPS
  • press apply device config
  • go back to main menu
  • go back to main display
  • you can additionally remove VF2,VF2-2 if you wish to clean the display, this won`t break your setup.

THEORY OF OPERATION

Free from the phone itself we get GPS moving speed.
By monitoring an injector wire we can get 2 different readings
  • injector opening duration
  • engine rpm
with those 3 key readings are computed injector duty cycle, fuel consumption,MPG and the trip computer data.

Monday, 30 April 2018

TOYOCOM:: Universal mode with a carburetor.

A LITTLE BACKGROUND


A year ago I was given a 1990 tercel DX coupe. It had issues to fix and I was glad to know how to.
It was then 28 years old while still showing under 100k km (about 60k miles) on the clock.

It got fixed here and there in the last year span; tires,suspension,brakes,body panels and exhaust system, engine valve seals and timing belt to name a few. The good old trusty 3E grew on me in that time lapse since it was so reliable, overshadowing the fact it is under powered to the extreme.

ENGINE OVERVIEW

It has got 82 hp and an A/T 3 gear transmission. starts like a charm on cold weather

It's an 1.5L 3E engine from 86 to 90. This engine uses a carburetor and a computer to control some peripherals and monitor it's overall operation. Very few existing sensors are useful on it, an oxygen sensor is there at least. all other sensors are switches. no analog sensors at all.(digital throttle position switch and digital temperature and vacuum switches)
The vacuum diagram is as complicated as a wiring diagram for a much more complex engine.it was the time where carburetors had to let got to full EFI.


Only E1(ground) and the VF (fuel trim) were available in the diagnosis box for the TOYOCOM to use. not even switched power (+B). Improvements had to be made to take full advantage of this setup.

GETTING  SOMETHING INTERESTING INTO TOYOBD1

An android car radio was installed to be able to gather data all the time from the TOYOCOM unit installed in the engine bay (blue box in the upper right corner of the preceding picture). this radio is setup to connect to the TOYOCOM every time TOYOBD1 starts.
  • VF is already there
  • E1 is already there
  • +B was routed from the engine harness reaching the fuse box.
  • Ox(oxygen sensor)  was routed into AB
  • Moving speed is taken from the android car radio GPS
Even though there were still custom inputs available on the TOYOCOM nothing else was routed to the diagnosis box yet.

WHAT WAS LEARNED FROM TOYOBD1

  • the alternator is poorly working but still operational. (battery voltage is low under all conditions)
  • the engine runs rich while idling and lean when held at WOT for a long time in 2nd or 3rd gear. it might have fuel delivery or carburetor issues
  • the fuel trim is always negative ,meaning the ECU suspects the fuel consumption is less than expected. It might be the oxygen sensor, might be fueling issues again
  • throttle position and temperature switches are working OK, the system goes from closed to open loop following engine load and growing engine temperature.

WHAT IS COMING AHEAD

More custom sensors are to be mounted on the engine to even out MPG calculations reserved only at this time to EFI engines. more sensors will be added to monitor the engine tune and improve it along the way as possible.
  • fuel flow sensors on fuel lines
  • MPG calculations for a carbureted engine in TOYOBD1
  • dirt cheap wideband oxygen sensor setup
  • rpm input from the igniter